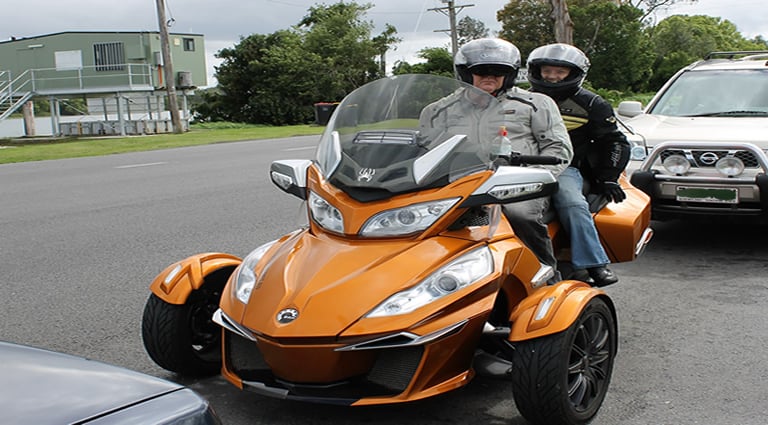
|
Tips and Tricks
Please let me know if you have any good Spyder tips.
Dreading replacing a tail light globe?
These are almost impossible to get to, especially if you have the BRP rack fitted, and a failure can cause "limp home" mode. Thanks to a post on Spyderryders.com a simple modification may solve the problem.


Passenger footpegs modification from John.
Hi all,
For some time now I have been looking at manufacturing some passenger footpeg extensions that shift the passenger footpegs forward, down and out slightly.
Follows are some photos of the prototype units that I have made.
They are manufactured from heavy wall (3mm) aluminium RHS with the footpeg stirrup from 25 * 10mm aluminium. All fasteners are stainless steel
Fortunately I now have access to a tube bender which did quite a good job on these units.
I wanted to bend in lieu of cutting and welding to achieve a more flowing look.
|
 |
I have also utilised two fixing points for each extender (hence the need for the bend) which I believe will result in something much stronger with less chance of the original mount fracturing from angular force.
Also made up another set that has a 13mm mounting hole instead of the stirrup arrangement to fit up a set of Kurykyn footpegs or boards with their standard male mount. I will probably change mine over to these in a while.
John Rose

Drive belt tip from Cookie
Found out that adjusting the drive belt could be difficult, as it is supposedly set at 1500lbs, and is tested with a Sonic Meter which costs about $2300. Well, I spoke to the Qld Gates rep and he told me I could try using a Single Barrel Tension Pen. I bought one from State Wide Bearings for $20 (also at CBC Bearings), Gates part no: 7401-0076.
The way it works is that it measures the force needed to move the belt a certain distance, and it can be used by taking a reading after a service (they’re supposed to check belt tension at each service) and then set the same next time! Handy if you have to replace or have the tyre fixed in the bush somewhere.
Do you like Steves mudguard conversion??
 |
If anyone is interested in showing off that big rear tyre, here's what I did.
I replaced the rear mud guard with a rear fender off a Kawasaki 2008 ZX14.
The shape and angle fit perfectly onto the plastic stone guard above the rear wheel. A few small drill holes and some wiring, and it's all done.
It looks good, especially with the Canam numberplate. Both these numberplates are still for sale.
Regards,
Steve
(If you try this be careful of the exposed belt without the belt guard. A small stone caught between the belt and sprocket can be expensive - it has happened! Steve is working on a custom belt guard now- will post details later.
Martin.) |

 |
Here are a few pictures of our Spyder with the headlight surrounds and front trim chromed as well as the finished belt guard - finally!!
We took the stock rear mud guard support and cut it down so that it was just higher than the belt. I re-plated the top section, used body filler and then coated it with gloss black. Easy custom belt guard.
Regards,
Steve
|


Exploded view and part numbers for Spyder. 130 pages in a 2.89mb PDF file. Assembled by "Sopher" a very loyal and devoted owner of Spyder #1339 - thanks.

Need a touch up??
Express Paint in the US will supply a Spyder colour matched "touch up pen" for around $25US including freight . Use this link and the paint codes below to order-
http://www.expresspaint.com/ProductCart/pc/manualorder.asp
Spyder Paint Codes (thanks to Lamonster)

The latest workshop manual, complete with all of the service bulletins etc is available for purchase on EBay from Midwest Manuals in the US.
This is downloadable, and is priced at US$29. (Thanks John Rose)

See Johns modifications to the numberplate and reversing light (Australian models only)

John has been good enough to put all the details and parts required in a PDF file. This is a much tidier installation and looks like it should have done from the start. It replaces both the reversing light and the number plate light with LED's.

Alan's pillion running boards.
First photo is of my running boards for my wife. They drop her feet about 1" and moved her feet about 4" forward.
The running boards I bought from Rising Sun Honda but they are a cheap set you can buy in most bike shops, they cost me$160.00 the pair,I then got the mounting bracket copied using 25ml tube 4" long, that cost me $90.00, then sprayed with a can, regards, Alan. |
 |

To remove the Spyders nose.
You may have need to remove the front luggage compartment to replace the sway bar, suspension or fit correctlly the temperature sensor that most seem to be missing.
step 1. open the front storage compartment cover. remove the service cover (black plastic cover accross the top, just pulls off) and unplug the diagnostic connector.
step 2. remove the two upper side panels using a torx t-30 wrench.
step 3. remove the front panels by releasing the three plastic rivets on each side (two on top, one on the bottom).
step 4. unplug the horn (left side) & temperature sensor (right side) THOUGH THIS MAY NOT BE FITTED . Release the harnesses from the clips on the storage compartment. , also unplug the headlight harness from the bulbs. Disconnect the trunk release cable (it just clips off)
step 5. using a 10mm socket, remove the four upper bolts attaching the front compartment to the frame. Be carefull when you refit these as I think I tightened one too much and stripped the hole .
step 6. using a 10mm socket, remove the two lower bolts (underneath the bike) attaching the front compartment to the frame.
step 7. lift the storage compartment off the front of the bike. note: if you have a 12v socket installed, unplug the harness while removing the storage compartment.
To refit reverse the above (don't forget the power outlet cables or you will have to remove it again- ask me how I know!!)

Ambient air temp and pressure sensor not installed?
This seems to relate only to Spyders assembled by Gold Coast Seadoo
In a recent post on Can Am Talk.com ," Beemerboy" says - "Do you smell a lot of gas fumes? poor gas milage? Dash air temp gauge read a lot higher than it is outside, and climbs real high in traffic? rough running in traffic? I sure did and fouled two spark plugs in 1200 miles. A 1 minute inspection needs to be done. Go to your bike right now, stand in front of, and looking at the hood, look into the front small air intake hole on left side, do you see a 10MM headed bolt holding a sensor or just a open slot? If not, your dealer did not unwrap the AAPTS (ambient air pressure and temp sensor) from around the frame and laying right on your coolant over flow bottle. This needed to be done when the trunk was installed at the dealer. He fixed his and now says "My bike went from 30mpg to over 40 , temp gauge seems accurate compared to bank sign temp, no more gas smell! Really smoothed out every thing, Easy low rpm control. SMOOTH SMOOTH SMOOTH"
In a post on Spydertalk.com,
(http://www.spydertalk.com/forums/index.php?showtopic=8302) Tharkun#409 has pointed out that a few owners have learned that the AAPTS (ambient air pressure and temp sensor) was not installed during the PDI (product delivery)
When I (Martin) fitted my Evoluzione swaybar I discovered that mine also was never installed! It makes sense as my ambient air temperature reading was always miles too high. You can see it here cable tied to my frame as it came from the factory .
It should be fitted with a foam cover as below. If the AAPTS has been installed, you will be able to confirm it by looking at the lower air inlet below the headlight on the right side of your Spyder -right side when on the bike, left side facing the bike - if all you see is an empty mounting point (like below but without the sensor) then it has not been done.

The piece of foam that is intended to protect the tip of the sensor, the bolt and plastic nut that secures the senor to the Spyder are all included in the PDI kit which is shipped in the storage compartment.
The foam cap can be seen in the PDI kit on the right. Not sure where this is now!
Be aware and check yours. |
 |

If you want to check for "fault codes" - turn the ignition switch to "on" , clear the warning message with the mode button on the left handlebar, then use the mode button to select the "Hr" mode (it must be in this mode), then depress the headlight override switch on the right front handlebar and the mode switch on the left front handlebar at the same time. While holding these two buttons in, quickly hit the high beam flasher button on the the left grip five times in quick succession - it needs to be quick - it took me a few tries. The fault codes will scroll across the instrument panel and you can relate the codes to the dealer.
Bob from Tassy writes- " Martin, I don't know if you know this, but to find the fault codes without using the headlight overide switch (leaves your right hand free to tap the headlight flasher) just do everything thats stated, but start the engine and have it running. You don't need to use the right hand bar button. Bob"

|